Have you ever seen those gorgeous chalkboard art pieces that float around pinterest and wished you could have that kind of talent? ME TOO.
I am not a traditional artist, at all. Give me a pencil and a piece of paper and anything I come up with is going to look like a 3rd grader drew it. My kindergarten class frequently comes up with drawings far better than mine.
I am however, pretty good with graphic art on the computer, and so I've found a way around my lack of artistic talent. Here's the process I used to make a piece of chalkboard art for my sons birthday, step-by-step.
You can start with a chalkboard of course, but I was going for something a little more rustic, so I used some chalkboard paint to create a mini chalkboard on a tree round. It took two coats, and I was good to go!
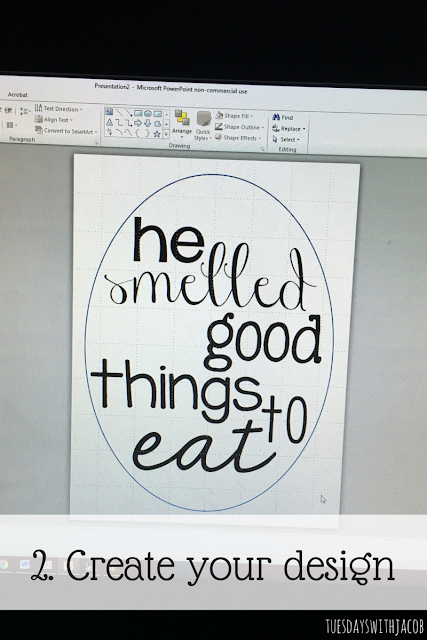
I opened up PowerPoint and used the shape tool to create an oval approximately the size of my tree round. I then inserted text boxes and added the text I wanted in varying fonts. I added a few pieces of clip art as well, then moved everything around little by little until I was happy with the design.
Next, I printed out the design, cut out the oval, turned it UPSIDE DOWN and traced it with pencil. The upside down part is important or else your design will be backwards.
I then placed the design over the tree round RIGHT SIDE UP, and scribbled over the design. This left a light transfer where I had traced it on the back!
Last, I filled in the design using a chalk marker. I wasn't super happy with how chunky it turned out, so I think next time I'll use some white craft paint and a thin brush. You can, of course, use chalk as well!
And Voila!
Here's a handy pin if you'd like to save this post to pinterest for future projects!


Post Comment
Post a Comment